This post will guide you through the use of Resplendent Data’s Virtual Columns tool.
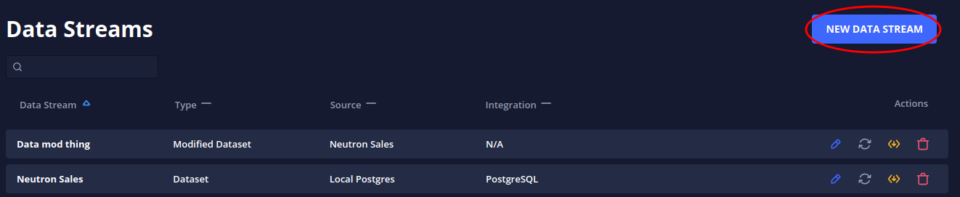
The first step to making a Virtual Column is creating a Modified Dataset, you can edit an existing one or create a new one on the Data Streams page by clicking the New Data Stream button.

Then click the New Modified Dataset button.

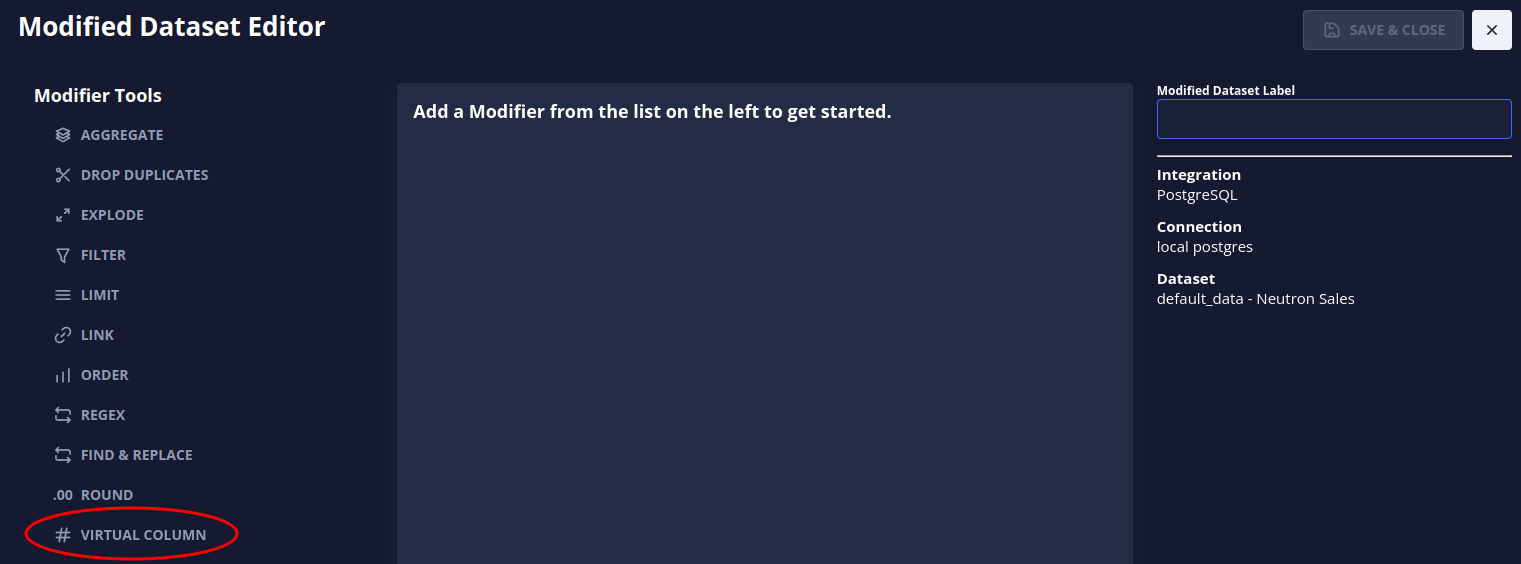
Next, select the dataset you would like to use.

Once you are inside the Modified Dataset Editor, you can add a Virtual Column by clicking the Virtual Column option in the list of Modifier Tools.
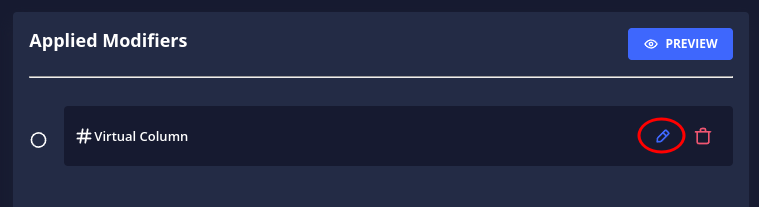
After you add a Virtual Column, just click the edit button to get started!
First, give your new Virtual Column a name so that you can find it later when you want to use it in other Modifier Tools or in a Dashboard.

Now let’s go over the 3 main components that can be used in a Virtual Column.
The Three Main Components in a Virtual Column
All three types of components have a few things in common. They all have a settings button and a drag handle. You can use the drag handle to drag a component and drop it on top of another to change the order of your components.

Different components have different settings options, but all of them have the delete option and an option to add parentheses around the component.
You can use parentheses to make sure some components are combined together before others. You can move the parentheses or delete them using the popup menu when you click on a parentheses.

Columns
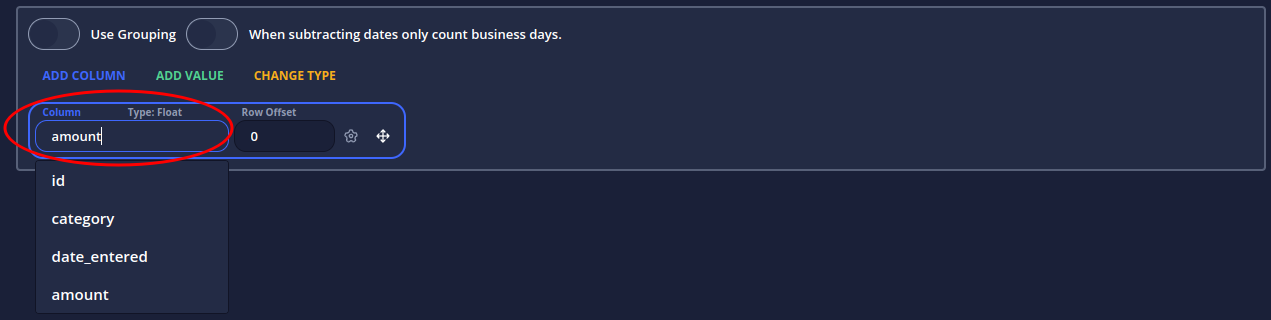
The Column component is often the core of a Virtual Column and lets you use your Dataset’s data inside the Virtual Column. This is the default component that you start with when you first open your Virtual Column. You can add more Columns with the Add Column button.
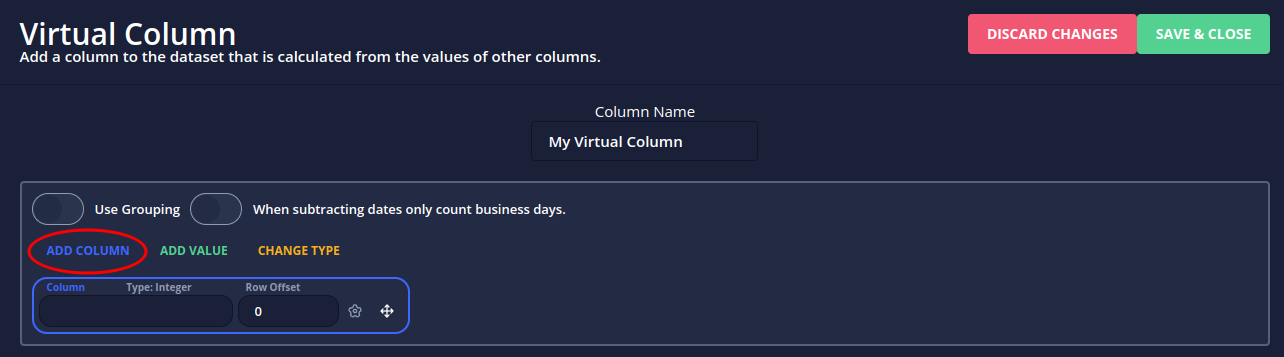
Most of the time all you need to do with Column components is select a column from your dataset, and you’re good to go!
Now that the Column component is set to the column you picked from your dataset, Your Virtual Column is just a copy of that column. Let’s take things a step further and add another column into the mix with the Add Column button.
Now that we have more than one component in our Virtual Column, we have to decide how to combine them, you can choose an operator like + or – to combine your objects by clicking the button between your components.

Advanced Column Options
Column components have a few options that can be used if you need to do something more advanced with your virtual column.
The first is Row Offset. This option lets you use the value of the selected column in a row offset by x rows with a positive value being the rows above and negative being the rows below.

In the example here we are using a row offset of 1 on the amount column. This means that the virtual column will have the value of the amount column in the row above it.
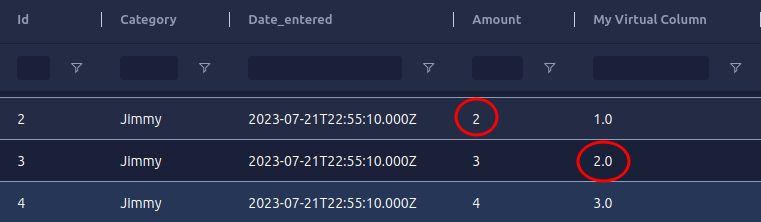
This can be useful if you need to combine the data from multiple rows into a single row in something like an audit trail table.
The next advanced option is inside the settings button. If you switch the option from Regular to Aggregate, you can pick a type of aggregation from the drop-down.
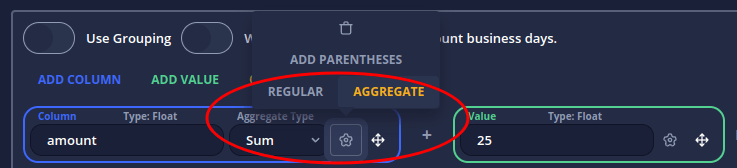
In this example sum is selected, so all of the values in the Virtual column will be the sum of all the values in the amount column.
Values
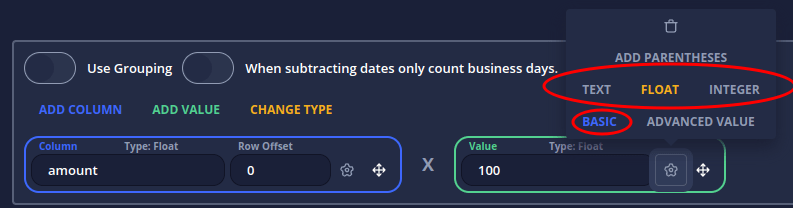
The Value Component lets you add a static or dynamic value into your virtual column like a number. a piece of text or a date.
In this example, we are multiplying the column “amount” by 100. Make sure to select the type of value you need with the settings button. In this case, we want a number so we can use the float or integer option. Keep in mind that floats can have decimal points while integers cannot.
If you’re dealing with dates you’ll probably want to use an advanced value, you can select this option with the settings button.
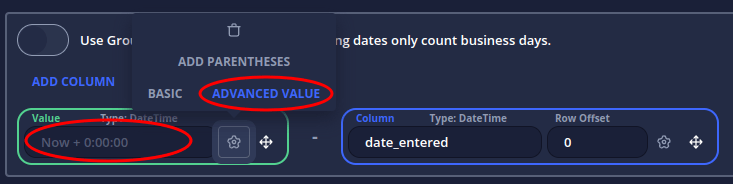
Once you select Advanced Value as your value type, you can click the input box to the left of the settings button to open the advanced value menu.
Once you’ve opened the Advanced Value menu, you can select the type of value you want.
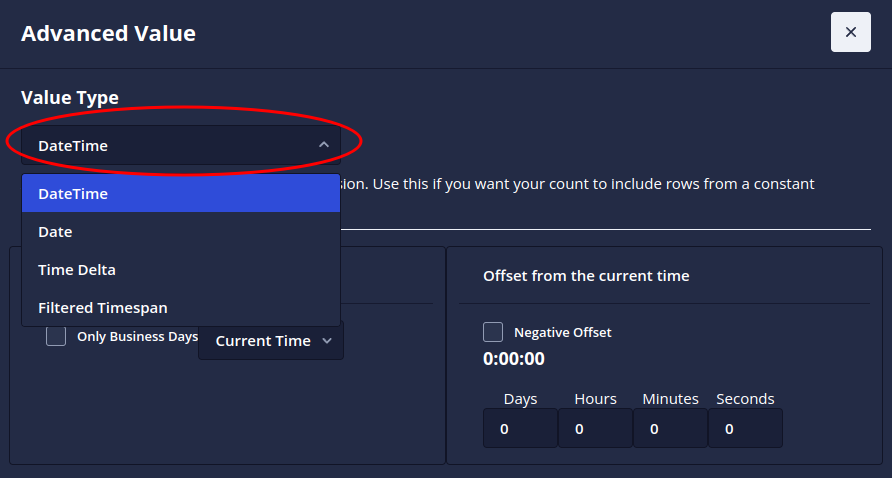
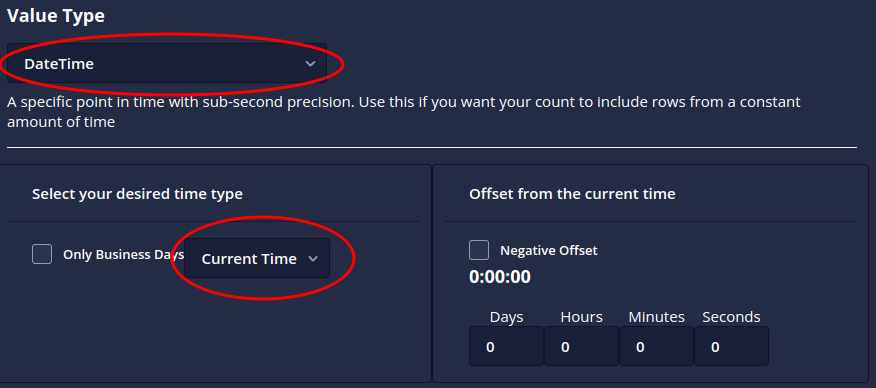
For example, if we want to calculate the time since this row was entered, we can select date-time as the value type, use Current Time as the Time Type, and leave the offset blank.
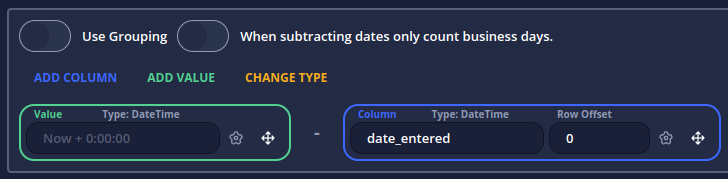
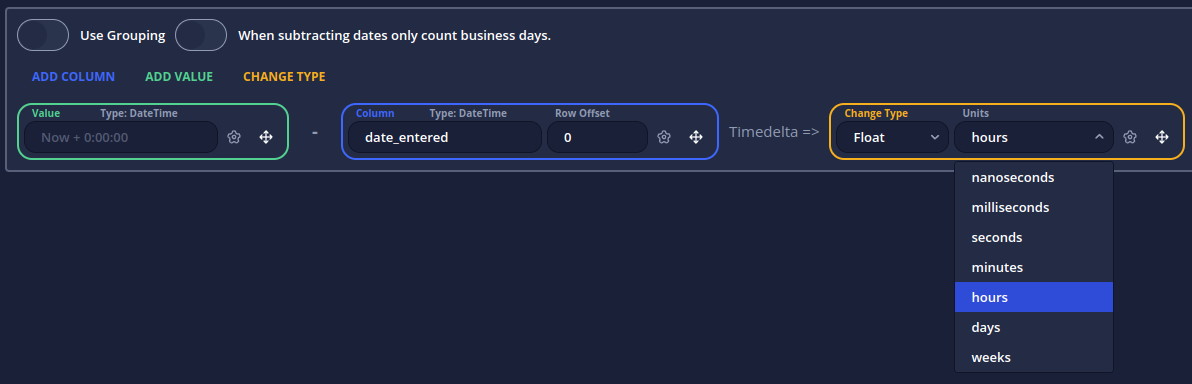
Now, if we subtract the date_entered column from our current time value, we get the amount of time since the row was entered.
Type Changes
Type Changes are all about converting a value or column or just a part of one, from one type to another. For example, if we wanted to get the number of hours since the row was entered in our example above we would add a Change Type component to change our time-delta to a number. In this case, we use a float so we can see the decimal points of the resulting numbers. We also need to select hours as the units for the type convert so that the app knows what kind of number we want to turn our time delta into.
Conclusion
Creating a Virtual Column with Resplendent Data’s Virtual Columns tool is not only intuitive but also offers a wide array of features to enrich your data analytics. Whether you’re looking to create simple copies of existing columns or aiming for complex aggregations and type conversions, the Virtual Columns tool has got you covered.
We’ve walked through the process step-by-step, starting from creating a Modified Dataset, selecting the desired dataset, and then diving into the Modified Dataset Editor. Here, you learned about the three main components: Columns, Values, and Type Changes. Columns help you incorporate dataset data into your virtual column, while Values allow you to add static or dynamic elements. With Type Changes, you can seamlessly convert data types for more detailed analytics.
The advanced features like Row Offset and aggregation options bring another layer of depth, making it a versatile tool for any kind of data manipulation task you have. With the use of parentheses, operators, and the easy drag-and-drop feature, organizing and computing data has never been easier.
In summary, Resplendent Data’s Virtual Columns tool is a powerful addition to your data manipulation toolkit. It’s designed to save you time and effort while offering the flexibility to perform a wide range of functions, from the simplest to the most complex. Happy data crunching!